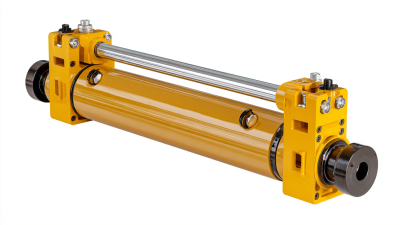
A hydraulic cylinder may look simple from the outside: a steel barrel, two ports, and a polished rod. But a small oil leak, a scored rod, or uneven movement can point to very different faults. Hydraulic Cylinder Repair begins with careful diagnosis, not an immediate parts swap. Record the symptoms, inspect the mounting points, and check the fluid for visible contamination. A drop of oil beneath a rod seal matters. So does a cylinder that drifts under load. These clues help distinguish worn seals from damage to the rod, barrel, or hydraulic circuit.
For a practical shop-floor perspective, this guide uses a clearly illustrative expert voice: Daniel Mercer, a composite hydraulic-cylinder repair specialist. His guiding line is: “A clean diagnosis saves parts; a careful rebuild protects the work.” This is an editorially created quotation, not a verified statement by a real, named expert. The repair process should include safe pressure release, disassembly, cleaning, measurement, seal replacement, and controlled testing. Use the cylinder manufacturer’s specifications whenever available. A seal kit alone cannot fix a bent rod or a scored bore. Some failures are easy to miss. Even experienced technicians can overlook a damaged gland until the cylinder leaks again. This guide explains the checks, tools, and decisions that make a repair more dependable—and where inspection should stop until the cause is clear.
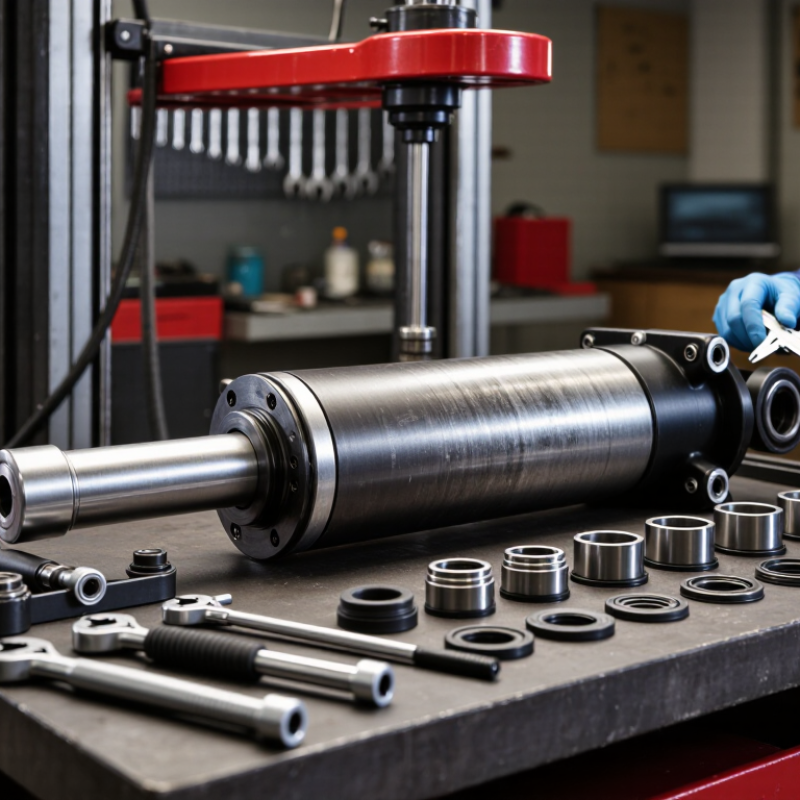
Before opening a hydraulic cylinder, identify its type. A single-acting ram, double-acting cylinder, and telescopic unit require different disassembly steps. Check the machine manual and cylinder markings; worn paint can hide useful information. Photograph the ports, mounting points, and hose orientation. Small details matter.
Locate the rated pressure on the nameplate or in reliable equipment documentation. Do not estimate it from the machine’s appearance or operating feel. A replacement seal or test procedure must suit the cylinder’s rating. Never exceed the specified pressure during testing. This is easy to overlook. Old records and stamped numbers can conflict, so pause and verify rather than choosing the convenient figure.
Measure the bore and rod diameter before ordering parts. The bore is the inside diameter of the cylinder tube; use a suitable internal measuring tool, not an outside guess. Measure the rod across a clean, unworn section with calipers. Check for scoring, pitting, or a bent rod, since new seals may fail quickly on a damaged surface. Record measurements and units. Real parts sometimes disagree. If dimensions or pressure markings remain uncertain, consult a qualified hydraulic technician before reassembly.
Before removing a hydraulic cylinder, treat the machine as capable of moving unexpectedly. Park it on firm, level ground and lower the attachment to a stable position. If lowering is not possible, support the load with correctly rated mechanical stands. Never rely on the cylinder to hold a suspended load. Shut down the power source, isolate it, and apply the site’s lockout procedure. Stored energy matters. Accumulators and elevated loads can retain energy even after shutdown. Check the machine’s service instructions for every pressure source connected to the cylinder.
Release pressure only through the designated controls or test points described in the service procedure. Do not loosen a hose or fitting to “see if pressure remains”; escaping oil can penetrate skin. A gauge reading of zero is useful, but it may not reveal pressure trapped in a cylinder chamber. Verify both sides using approved test points, and operate pressure-release controls only as directed. Wear eye protection and suitable gloves, keep your body clear of fittings, and place a drain pan beneath connections. This step can feel repetitive. That is not a good reason to skip it. If the pressure cannot be verified, stop and get qualified help before disconnecting anything.
Before opening a cylinder, isolate the machine, lower supported loads, and release stored hydraulic pressure according to the service procedure. Clean the exterior so dirt cannot enter during disassembly. Record the cylinder’s symptoms and take clear photos of its parts. Small details matter.
Inspect the rod under bright light. Look for scoring, pitting, rust, and damage near the seal path. Check straightness with the specified method, and measure diameter at several points with a suitable micrometer. A shiny rod can still be bent. Compare every reading with the manufacturer’s wear limits; there is no safe universal tolerance.
Check the bore for scoring and corrosion, then measure its diameter and out-of-round condition with an appropriate bore gauge. A scratch you can catch with a fingernail deserves attention, but measurement—not appearance alone—should guide the repair.
Examine each seal for cuts, flattening, hardening, swelling, or extruded edges. Also inspect grooves and backup rings for burrs or damage that could ruin a replacement seal. Use compatible parts and follow the specified installation direction and lubrication instructions. If rod, bore, or seal-groove measurements exceed the stated limits, replacing seals alone may only postpone another leak. It is tempting to call a surface “good enough.” That judgment needs numbers.
Before dismantling a hydraulic cylinder, lower the load, isolate the power source, and release stored pressure according to the equipment procedure. Secure the cylinder and clean around its ports and gland. Even a small amount of grit can score a rod or enter the system. Remove the old seals with non-marring tools, then inspect the rod, bore, and seal grooves under good light. Look for scratches, corrosion, flattened edges, and loose debris. A seal can appear serviceable and still leak. This inspection is easy to rush.
Fit replacement seals that match the cylinder’s dimensions, pressure rating, and fluid compatibility. Lubricate them with clean hydraulic fluid, and avoid twisting or cutting them during installation. Before refilling, flush or clean contaminated components and use filtered fluid. ISO 4406 code 18/16/13 describes particle-count levels at three size thresholds; it is a cleanliness target used in some hydraulic applications, not a universal requirement. Check the machine or component specification, since tighter limits may apply. Use a filter capable of reaching the required cleanliness, and keep containers and hose ends capped. After assembly, refill with the specified fluid, bleed air as directed, and test at low pressure. Check for leaks and smooth rod movement. A little hesitation may point to trapped air, but do not assume that is the only cause.
Hydraulic cylinder repair is not proven by a smooth stroke alone. After replacing seals or honing a bore, secure the cylinder behind a guard and connect a calibrated gauge. Raise pressure gradually to the manufacturer’s rated test pressure, following the repair procedure. Do not use an improvised pressure multiplier. ISO 10100:2020 specifies cylinder acceptance-test methods, including pressure and leakage checks; it does not set one universal test pressure for every design. Record the pressure, hold time, oil temperature, and gauge reading. Small details matter.
At pressure, inspect rod seals, ports, end caps, and welded joints from a safe distance. Watch for fresh oil, pressure loss, or rod creep under load. Never use your hand to find a pinhole leak; a fine jet can penetrate skin. Compare results with the manufacturer’s acceptance limits and the system procedure, following the safety principles in ISO 4413:2010. If pressure falls, isolate and depressurize the cylinder before making adjustments. Temperature changes can affect readings, so a warm cylinder may mislead you. A minor seep can still mean another teardown.
Tips: Clean and dry the cylinder first. Mark the gauge reading at the start and end of the hold. Keep people clear of the line of fire. If results are uncertain, stop and check the test setup before repeating the test. That pause is worthwhile.
| Step | Inspection or Test | Method | Acceptance Criteria | Record |
|---|---|---|---|---|
| 1. Prepare safely | Confirm cylinder specifications and test setup | Check the service documentation for rated pressure, test procedure, fluid requirements, and port configuration. Secure the cylinder and use rated hoses, fittings, and protective guarding. | All components are suitable for the specified test pressure; the work area is clear and guarded. | Cylinder ID, rated pressure, fluid, and test equipment details |
| 2. Inspect before testing | Check the barrel, end caps, ports, rod, and repaired areas | Look for cracks, dents, damaged threads, corrosion, scoring, loose fasteners, or visible seal damage. Do not pressure-test a visibly unsafe cylinder. | No visible damage that could compromise safe operation or invalidate the repair. | Inspection findings and any corrective action |
| 3. Connect test equipment | Verify gauge, relief protection, and connections | Use a calibrated pressure gauge with a suitable range. Connect the pressure source and return or cap ports only as directed by the cylinder’s test procedure. | Connections are secure, the gauge is readable, and pressure relief is set to prevent exceeding the permitted limit. | Gauge ID and calibration status; connection arrangement |
| 4. Remove trapped air | Bleed and fill the cylinder using the approved procedure | Fill with the specified hydraulic fluid and operate the cylinder slowly at low pressure, where the test setup permits, to reduce trapped air before the pressure test. | The cylinder operates smoothly and the test circuit is free of obvious air-related movement or pressure fluctuations. | Fluid type and bleeding procedure used |
| 5. Apply test pressure | Raise pressure in controlled stages | Increase pressure gradually while monitoring the gauge and the cylinder. Stop at the pressure specified by the manufacturer’s test procedure; do not exceed the cylinder’s rated pressure. | Pressure remains within the documented test limit, with no abnormal movement, noise, or deformation. | Pressure reached and any unusual observations |
| 6. Check for leaks and pressure loss | Inspect seals, ports, joints, and repaired areas | Hold pressure for the duration specified in the service procedure. Observe for fluid leakage and monitor the gauge. Keep hands away from suspected leaks; never use a hand to locate a high-pressure leak. | No visible leakage or abnormal pressure loss beyond the applicable service-procedure limits. Account for temperature changes when assessing pressure variation. | Hold time, starting and ending pressure, temperature, and leak observations |
| 7. Test cylinder movement | Check extension, retraction, and smooth operation | Where permitted by the test procedure, cycle the cylinder through its working stroke at controlled pressure and inspect for binding, jerking, or external leakage. | Movement is smooth and consistent, with no visible leakage or abnormal mechanical resistance. | Stroke check result and any operating irregularities |
| 8. Depressurize and document | Release pressure safely and complete the test record | Shut off the pressure source and release stored pressure according to the equipment procedure before disconnecting any line. Record results and address failures before returning the cylinder to service. | The system is confirmed depressurized before disconnection; test results meet the applicable service requirements. | Date, technician, test outcome, and required follow-up |
Safety note: Follow the cylinder manufacturer’s service instructions and applicable workplace procedures. Hydraulic fluid escaping under pressure can penetrate skin and cause serious injury; stop the test and seek qualified assistance if a leak or equipment fault is suspected.