How to Replace Your Cabin Filter for Better Air Quality?
Air quality in your vehicle significantly impacts your comfort and health. One crucial component of this is the Cabin Filter. This small yet essential part prevents dust, pollen, and other pollutants from entering your car’s interior. As time passes, however, it can become clogged and inefficient.
Replacing your Cabin Filter is not just recommended; it is necessary for maintaining clean air. A dirty filter can lead to musty odors and reduced airflow. You might notice sneezing or feelings of congestion while driving. These symptoms indicate that the Cabin Filter needs attention. Addressing this issue can enhance your overall driving experience.
Many people overlook the importance of regularly changing their Cabin Filter. They often wait until problems arise, which is not ideal. Regular maintenance can help avoid costly repairs down the road. Take a moment to reflect on whether you've checked your filter lately. Better air quality is just a filter change away.
Understanding the Role of Cabin Air Filters in Vehicle Air Quality
The cabin air filter plays a crucial role in maintaining air quality within your vehicle. It acts as a barrier against dust, pollen, and other pollutants. When you drive, outside air enters the cabin through the HVAC system. The filter traps harmful particles, improving the air you breathe.
A clogged or dirty filter can lead to poor air quality. You might notice musty odors or reduced airflow. These signs indicate it’s time for a change. Pollutants can accumulate, making your drives uncomfortable. Regularly checking your filter ensures a healthier environment inside your vehicle.
Changing the Cabin Air Filter isn't a daunting task. With a little focus, you can enhance your air quality. Take the time to inspect the filter regularly. Look for debris and discoloration. Consider how often you drive in heavily polluted areas. Reflect on your health and comfort while on the road.
Identifying Signs That Your Cabin Filter Needs Replacement
A clean cabin filter is essential for good air quality in your vehicle. But how do you know when it’s time for a replacement? First, pay attention to unusual odors inside your car. A musty or foul smell can signal a dirty filter. Dust and pollen can accumulate, leading to poor air circulation.
If you notice decreased airflow from the vents, that's another sign. You may feel like you are not getting enough fresh air. This could be a result of a blocked filter. Additionally, if your eyes start to itch or you sneeze frequently while driving, allergens could be building up. A clogged filter can exacerbate these symptoms.
Check your filter visually. If it's discolored or covered in grime, it's time to replace it. Set a reminder to check your cabin filter regularly, especially if you drive frequently in polluted areas. Neglect can lead to health issues. Air quality matters, and a simple filter change can improve your driving experience significantly.
Air Quality Improvement with Cabin Filter Replacement
This chart illustrates the correlation between the frequency of cabin filter replacement and the perceived air quality inside a vehicle. Regular replacement of cabin filters can lead to significant improvements in air quality, making the driving experience healthier and more pleasant.
Step-by-Step Guide to Accessing Your Cabin Air Filter
Cabin air filters play a crucial role in maintaining the quality of air inside vehicles. Properly functioning filters can remove up to 99% of dust, pollen, and other airborne particles, according to industry reports. However, many drivers overlook the importance of regular replacements. It's recommended to check your cabin filter every 15,000 to 30,000 miles, but often drivers wait too long, leading to decreased air quality.
To access your cabin air filter, start by locating the glove compartment. Usually, you can find screws or clips that hold it in place. If you're unsure, check your vehicle's manual for specific instructions. Once you've accessed the compartment, removing the filter is typically straightforward. However, many people rush this process. They may not notice accumulated debris or a worn-out filter. Cleaning out the compartment while replacing the filter improves air flow and ensures a more thorough replacement.
Many drivers underestimate the difference a clean cabin filter can make. It's about more than just fresh air; poor air quality can impact your comfort and health during drives. In fact, the World Health Organization cites that indoor air pollution can lead to respiratory issues. When you replace your filter regularly, you contribute to a healthier driving environment for yourself and your passengers. Avoid making the mistake of ignoring routine maintenance. Take the time to ensure you breathe easy on the road.
How to Replace Your Cabin Filter for Better Air Quality?
| Step | Description | Tools Needed | Estimated Time |
| 1 | Locate the cabin air filter access panel, usually found behind the glove compartment or under the dashboard. | None | 5 minutes |
| 2 | Remove the access panel by unscrewing or unclipping it, depending on your vehicle model. | Screwdriver or clip removal tool | 10 minutes |
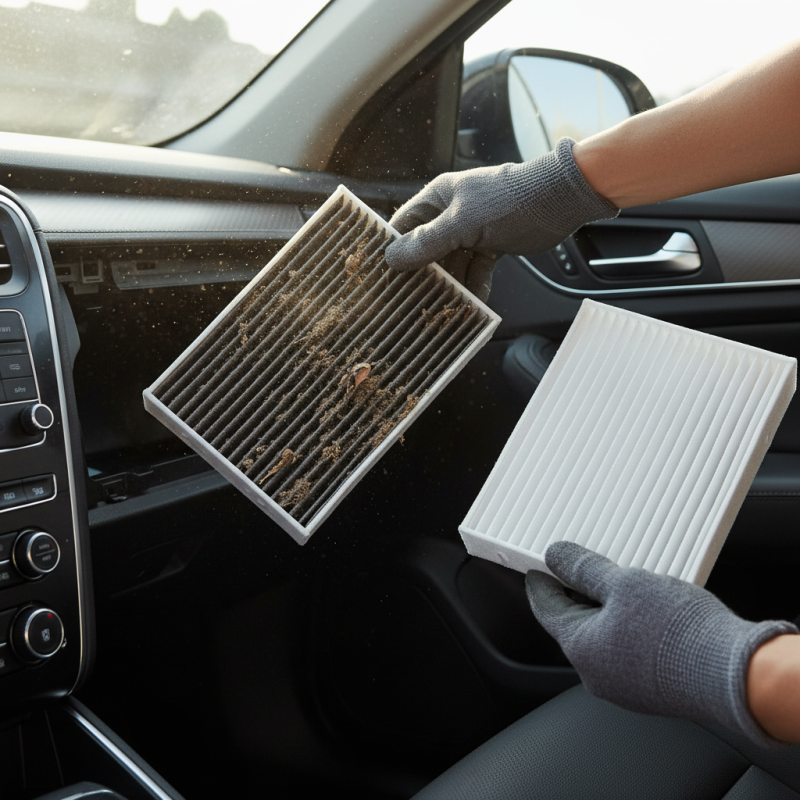
| 3 | Carefully pull out the old cabin air filter. Pay attention to its orientation to ensure the new filter is installed correctly. | None | 5 minutes |
| 4 | Insert the new cabin air filter into the slot, ensuring it's oriented in the same way as the old one. | New cabin air filter | 5 minutes |
| 5 | Reattach the access panel, securing it with screws or clips. | Screwdriver or clip removal tool | 10 minutes |
| 6 | Test the new cabin air filter by running the vehicle's air system to check for improved airflow. | None | 5 minutes |
Choosing the Right Replacement Cabin Air Filter for Your Vehicle
When selecting a replacement cabin air filter, several factors come into play. It's crucial to know your vehicle’s specifications. Filters come in different sizes and types. You can find options that include activated carbon or HEPA filters. Each type has unique benefits, especially regarding air quality.
Consider the environment where you drive. If you're in a city with high pollution, an activated carbon filter is better. It helps trap odors and harmful particles. In contrast, a HEPA filter may serve you well if you have allergies. It's essential to think about your specific needs; there's no one-size-fits-all.
Moreover, quality matters. Some cheaper filters might not offer adequate filtration. Cheap materials may break down quickly. They can even release particles back into the cabin. Take time to research options before buying. Sometimes, spending a bit more pays off in the long run. Always check the filter's reviews and compatibility before making a decision.
Maintenance Tips for Prolonging the Life of Your Cabin Filter
Maintaining your cabin filter is crucial for optimal air quality in your vehicle. Studies indicate that a clogged cabin filter can reduce airflow by 50%. This leads to increased pollutants inside your car. Regular maintenance can improve your driving experience significantly.
To prolong the life of your cabin filter, replace it every 15,000 to 30,000 miles. Pollutants like pollen, dust, and exhaust fumes can degrade filter performance. Ensure your filter is clean and free of debris. You might need to check it more frequently in high-pollen seasons.
Proper installation is also vital. An ill-fitted filter can allow unfiltered air into your cabin. That’s not ideal for anyone, especially those with allergies. Regular inspections can help catch issues early. Clean your filter gently with mild soap and water if reusable. But remember, some filters need full replacement. Ensuring your vehicle’s ventilation system is performing optimally enhances comfort and health on the road.